


搜索到
20
篇与
» 建站技巧
的结果
-
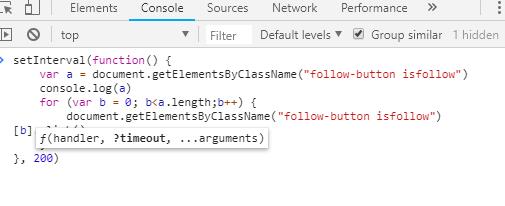 快手一键取关JS代码 前言假如某天你不再想刷快手,并想取消所有关注,但是你关注的人却很多,一个一个取消太累了,那怎么办呢?本文章教你一个快速的方法!截图教程登录网页版,进入个人主页关注页面————截图中的页面,然后在控制台输入下面的JS代码setInterval(function() { var a = document.getElementsByClassName("isfollow") for (var b = 0; b < a['length']; b++) { document.getElementsByClassName("isfollow")[b]['click'](); } }, 800)
-

-

-
 烟雨图床对接github全面教程 {tabs}{tabs-pane label="前台截图"} {/tabs-pane}{tabs-pane label="后台截图"} {/tabs-pane}{/tabs}1、新建站点,然后源码上传到站点根目录(运行目录设置为根目录下的/Public目录)2、新建数据库,然后导入根目录下的数据库文件 install.sql3、修改数据库链接配置:/App/Database.php4、配置伪静态,Apache无需要配置已经配置好文件了,nginx伪静态规则在程序根目录有个nginx.txt,复制规则配置即可5、设置/public目录为777权限后台地址:http(s)://域名/admin/login/后台帐号:admin 帐号密码:123456隐藏内容,请前往内页查看详情 1.新建github仓库 地址: https://github.com/new {card-list}{card-list-item} {/card-list-item}{card-list-item} {/card-list-item}{/card-list}2.配置Token 直链: https://github.com/settings/tokens点击“Generate a personal access token”: 2.设置 token 名字勾选权限:repo:Full control of private repositories 和write:packages前打勾,然后点击确定就生成token了。 token得收藏起来,因为它就显示一次。{timeline}{timeline-item color="#19be6b"} 给您们看看我的后台配置{/timeline-item}{timeline-item color="#19be6b"} {/timeline-item}{/timeline}
-
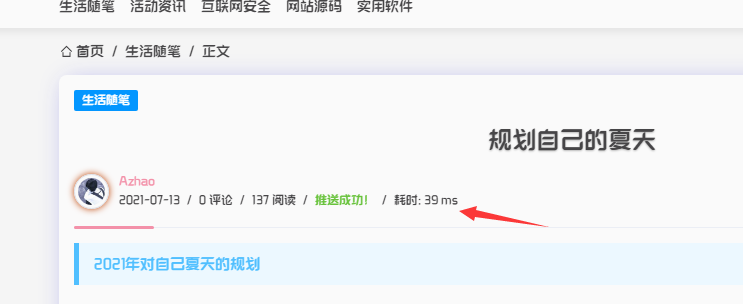 Typecho获取当前页面加载耗时完成速度时间 {mtitle title="介绍"/}判断 当前页面加载 是否快速,通常是直接在浏览器中访问网站,看自己的直观感受是否 快速 。而客观的方法则是计算具体的页面 加载时间 并显示出来给看。{mtitle title="教程"/}{tabs}{tabs-pane label="步骤一"}在当前主题的functions.php文件添加下面的代码function timer_start() { global $timestart; $mtime = explode( ' ', microtime() ); $timestart = $mtime[1] + $mtime[0]; return true; } timer_start(); function timer_stop( $display = 0, $precision = 3 ) { global $timestart, $timeend; $mtime = explode( ' ', microtime() ); $timeend = $mtime[1] + $mtime[0]; $timetotal = number_format( $timeend - $timestart, $precision ); $r = $timetotal < 1 ? $timetotal * 1000 . " ms" : $timetotal . " s"; if ( $display ) { echo $r; } return $r; }{/tabs-pane}{tabs-pane label="步骤二"} 在显示加载时间的位置添加调用代码<span class="line">/</span> 耗时: <?php echo timer_stop();?> {/tabs-pane}{tabs}{tabs-pane label="效果图"} {/tabs-pane}{/tabs}
-
 幻影文字CSS特效 使用方法导入CSS文件joe主题就放在主题设置的 自定义css 里。在需要使用的标签上加上 class="h1" 属性举例 幻影文字特效@import 'https://fonts.googleapis.com/css?family=Lato'; .h1 { animation: glitch 3s steps(100) infinite; color: #151515; font-size: 1.2em; text-align: center; text-transform: uppercase; } @keyframes glitch { 0% { text-shadow: 3px 0 0 red, -3px 0 0 #0c33f5; filter: blur(0);} 1% { text-shadow: 3px 0 0 red, -3px 0 0 #0c33f5; filter: blur(0);} 2% { text-shadow: 3px 0 0 red, -3px 0 0 #0c33f5; filter: blur(0);} 3% { text-shadow: 3px 0 0 red, -3px 0 0 #0c33f5; filter: blur(0);} 4% { text-shadow: 3px 0 0 red, -3px 0 0 #0c33f5; filter: blur(0);} 5% { text-shadow: -3px 0 0 red, 3px 0 0 #0c33f5; filter: blur(0);} 6% { text-shadow: -3px 0 0 red, 3px 0 0 #0c33f5; filter: blur(0);} 7% { text-shadow: -3px 0 0 red, 3px 0 0 #0c33f5; filter: blur(0);} 8% { text-shadow: -3px 0 0 red, 3px 0 0 #0c33f5; filter: blur(0);} 9% { text-shadow: -3px 0 0 red, 3px 0 0 #0c33f5; filter: blur(0);} 10% { text-shadow: -3px 0 0 red, 3px 0 0 #0c33f5; filter: blur(0);} 11% { text-shadow: 1px 0 0 red, -1px 0 0 lime; filter: blur(0.5px);} 12% { text-shadow: 1px 0 0 red, -1px 0 0 lime; filter: blur(0.5px);} 13% { text-shadow: 1px 0 0 red, -1px 0 0 lime; filter: blur(0.5px);} 14% { text-shadow: 1px 0 0 red, -1px 0 0 lime; filter: blur(0);} 15% { text-shadow: 1px 0 0 red, -1px 0 0 lime; filter: blur(0);} 16% { text-shadow: -3px 0 0 red, 3px 0 0 lime; filter: blur(0);} 17% { text-shadow: -3px 0 0 red, 3px 0 0 lime; filter: blur(0);} 18% { text-shadow: -3px 0 0 red, 3px 0 0 lime; filter: blur(0);} 19% { text-shadow: -3px 0 0 red, 3px 0 0 lime; filter: blur(0);} 20% { text-shadow: -3px 0 0 red, 3px 0 0 lime; filter: blur(0);} 21% { text-shadow: 0.8px 0 0 #0c33f5, -0.8px 0 0 lime; filter: blur(0);} 22% { text-shadow: 0.8px 0 0 #0c33f5, -0.8px 0 0 lime; filter: blur(0);} 23% { text-shadow: 0.8px 0 0 #0c33f5, -0.8px 0 0 lime; filter: blur(0);} 24% { text-shadow: 0.8px 0 0 #0c33f5, -0.8px 0 0 lime; filter: blur(0);} 25% { text-shadow: 0.8px 0 0 #0c33f5, -0.8px 0 0 lime; filter: blur(0);} 26% { text-shadow: 0.8px 0 0 #0c33f5, -0.8px 0 0 lime; filter: blur(0.5px);} 27% { text-shadow: 0.8px 0 0 #0c33f5, -0.8px 0 0 lime; filter: blur(0.5px);} 28% { text-shadow: 0.8px 0 0 #0c33f5, -0.8px 0 0 lime; filter: blur(0);} 29% { text-shadow: 0.8px 0 0 #0c33f5, -0.8px 0 0 lime; filter: blur(0);} 30% { text-shadow: 0.8px 0 0 #0c33f5, -0.8px 0 0 lime; filter: blur(0);} 31% { text-shadow: -3px 0 0 #0c33f5, 3px 0 0 lime; filter: blur(0);} 32% { text-shadow: -3px 0 0 #0c33f5, 3px 0 0 lime; filter: blur(0);} 33% { text-shadow: -3px 0 0 #0c33f5, 3px 0 0 lime; filter: blur(0);} 34% { text-shadow: -3px 0 0 #0c33f5, 3px 0 0 lime; filter: blur(0);} 35% { text-shadow: -3px 0 0 #0c33f5, 3px 0 0 lime; filter: blur(0.5px);} 36% { text-shadow: -3px 0 0 #0c33f5, 3px 0 0 lime; filter: blur(0.5px);} 37% { text-shadow: -3px 0 0 #0c33f5, 3px 0 0 lime; filter: blur(0.5px);} 38% { text-shadow: -3px 0 0 #0c33f5, 3px 0 0 lime; filter: blur(0);} 39% { text-shadow: -3px 0 0 #0c33f5, 3px 0 0 lime; filter: blur(0);} 40% { text-shadow: -3px 0 0 #0c33f5, 3px 0 0 lime; filter: blur(0);} 41% { text-shadow: 45px 0 0 #0c33f5, -45px 0 0 lime; filter: blur(0);} 42% { text-shadow: 0 0 0 #0c33f5, 0 0 0 lime; filter: blur(0);} 43% { text-shadow: 1px 0 0 red, -1px 0 0 lime; filter: blur(0);} 44% { text-shadow: 1px 0 0 red, -1px 0 0 lime; filter: blur(0);} 45% { text-shadow: 1px 0 0 red, -1px 0 0 lime; filter: blur(0);} 46% { text-shadow: 1px 0 0 red, -1px 0 0 lime; filter: blur(0.5px);} 47% { text-shadow: -3px 0 0 red, 3px 0 0 lime; filter: blur(0.5px);} 48% { text-shadow: -3px 0 0 red, 3px 0 0 lime; filter: blur(0);} 49% { text-shadow: -3px 0 0 red, 3px 0 0 lime; filter: blur(0);} 50% { text-shadow: -3px 0 0 red, 3px 0 0 lime; filter: blur(0);} 51% { text-shadow: 3px 0 0 red, -3px 0 0 #0c33f5; filter: blur(0);} 52% { text-shadow: 3px 0 0 red, -3px 0 0 #0c33f5; filter: blur(0);} 53% { text-shadow: 3px 0 0 red, -3px 0 0 #0c33f5; filter: blur(0);} 54% { text-shadow: 3px 0 0 red, -3px 0 0 #0c33f5; filter: blur(0);} 55% { text-shadow: 3px 0 0 red, -3px 0 0 #0c33f5; filter: blur(0.5px);} 56% { text-shadow: -3px 0 0 red, 3px 0 0 #0c33f5; filter: blur(0.5px);} 57% { text-shadow: -3px 0 0 red, 3px 0 0 #0c33f5; filter: blur(0.5px);} 58% { text-shadow: -3px 0 0 red, 3px 0 0 #0c33f5; filter: blur(0);} 59% { text-shadow: -3px 0 0 red, 3px 0 0 #0c33f5; filter: blur(0);} 60% { text-shadow: -3px 0 0 red, 3px 0 0 #0c33f5; filter: blur(0);} 61% { text-shadow: 30px 0 0 red, -30px 0 0 lime; filter: blur(0);} 62% { text-shadow: 0 0 0 red, 0 0 0 lime; filter: blur(0);} 63% { text-shadow: 1px 0 0 red, -1px 0 0 #0c33f5; filter: blur(0);} 64% { text-shadow: 1px 0 0 red, -1px 0 0 #0c33f5; filter: blur(0);} 65% { text-shadow: 1px 0 0 red, -1px 0 0 #0c33f5; filter: blur(0);} 66% { text-shadow: 1px 0 0 red, -1px 0 0 #0c33f5; filter: blur(0.5px);} 67% { text-shadow: -3px 0 0 red, 3px 0 0 #0c33f5; filter: blur(0.5px);} 68% { text-shadow: -3px 0 0 red, 3px 0 0 #0c33f5; filter: blur(0);} 69% { text-shadow: -3px 0 0 red, 3px 0 0 #0c33f5; filter: blur(0);} 70% { text-shadow: -3px 0 0 red, 3px 0 0 #0c33f5; filter: blur(0);} 71% { text-shadow: 50px 0 0 red, -50px 0 0 #0c33f5; filter: blur(0);} 72% { text-shadow: 0 0 0 red, 0 0 0 #0c33f5; filter: blur(0);} 73% { text-shadow: 3px 0 0 red, -3px 0 0 #0c33f5; filter: blur(0);} 74% { text-shadow: 3px 0 0 red, -3px 0 0 #0c33f5; filter: blur(0);} 75% { text-shadow: 3px 0 0 red, -3px 0 0 #0c33f5; filter: blur(0);} 76% { text-shadow: 3px 0 0 red, -3px 0 0 #0c33f5; filter: blur(0);} 77% { text-shadow: -3px 0 0 red, 3px 0 0 #0c33f5; filter: blur(0);} 78% { text-shadow: -3px 0 0 red, 3px 0 0 #0c33f5; filter: blur(0);} 79% { text-shadow: -3px 0 0 red, 3px 0 0 #0c33f5; filter: blur(0);} 80% { text-shadow: -3px 0 0 red, 3px 0 0 #0c33f5; filter: blur(0);} 81% { text-shadow: 1px 0 0 red, -1px 0 0 lime; filter: blur(0);} 82% { text-shadow: 1px 0 0 red, -1px 0 0 lime; filter: blur(0);} 83% { text-shadow: 1px 0 0 red, -1px 0 0 lime; filter: blur(0.5px);} 84% { text-shadow: 1px 0 0 red, -1px 0 0 lime; filter: blur(0.5px);} 85% { text-shadow: 1px 0 0 red, -1px 0 0 lime; filter: blur(0.5px);} 86% { text-shadow: -3px 0 0 red, 3px 0 0 lime; filter: blur(0.5px);} 87% { text-shadow: -3px 0 0 red, 3px 0 0 lime; filter: blur(0.5px);} 88% { text-shadow: -3px 0 0 red, 3px 0 0 lime; filter: blur(0);} 89% { text-shadow: -3px 0 0 red, 3px 0 0 lime; filter: blur(0);} 90% { text-shadow: -3px 0 0 red, 3px 0 0 lime; filter: blur(0);} 91% { text-shadow: 60px 0 0 lime, -60px 0 0 #0c33f5; filter: blur(0);} 92% { text-shadow: 0 0 0 lime, 0 0 0 #0c33f5; filter: blur(0);} 92% { text-shadow: 0.8px 0 0 #0c33f5, -0.8px 0 0 lime; filter: blur(0);} 93% { text-shadow: 0.8px 0 0 #0c33f5, -0.8px 0 0 lime; filter: blur(0);} 94% { text-shadow: 0.8px 0 0 #0c33f5, -0.8px 0 0 lime; filter: blur(0);} 95% { text-shadow: 0.8px 0 0 #0c33f5, -0.8px 0 0 lime; filter: blur(0);} 96% { text-shadow: -3px 0 0 #0c33f5, 3px 0 0 lime; filter: blur(0);} 97% { text-shadow: -3px 0 0 #0c33f5, 3px 0 0 lime; filter: blur(0);} 98% { text-shadow: -3px 0 0 #0c33f5, 3px 0 0 lime; filter: blur(0);} 99% { text-shadow: -3px 0 0 #0c33f5, 3px 0 0 lime; filter: blur(0);} 100% { text-shadow: -3px 0 0 #0c33f5, 3px 0 0 lime; filter: blur(0);} }
-
 QQ邮箱自动删除邮件脚本 原理很简单,定时器每三秒执行一次,执行两个点击事件,一个是勾选当前页,一个是删除!f12在控制台执行脚本即可开始删除!脚本代码window.setInterval(function() {document.getElementById('mainFrame').contentWindow.document.getElementById('ckb_selectAll').click();document.getElementById('mainFrame').contentWindow.document.getElementById('quick_del').click();},3000)如何停止脚本:按f5刷新浏览器即可或者关闭当前窗口,脚本执行后请不要用鼠标点击切换页面否则可能会删除你切换到的页面的邮件。
-
 typecho实时在线人数统计代码 要实现实时在线统计,首先在主题文件里的functions.php里面下面的代码添加/* Joe核心文件 */ require_once("core/core.php"); //在线人数 放这里//在线人数 function online_users() { $filename='online.txt'; //数据文件 $cookiename='Nanlon_OnLineCount'; //Cookie名称 $onlinetime=30; //在线有效时间 $online=file($filename); $nowtime=$_SERVER['REQUEST_TIME']; $nowonline=array(); foreach($online as $line){ $row=explode('|',$line); $sesstime=trim($row[1]); if(($nowtime - $sesstime)<=$onlinetime){ $nowonline[$row[0]]=$sesstime; } } if(isset($_COOKIE[$cookiename])){ $uid=$_COOKIE[$cookiename]; }else{ $vid=0; do{ $vid++; $uid='U'.$vid; }while(array_key_exists($uid,$nowonline)); setcookie($cookiename,$uid); } $nowonline[$uid]=$nowtime; $total_online=count($nowonline); if($fp=@fopen($filename,'w')){ if(flock($fp,LOCK_EX)){ rewind($fp); foreach($nowonline as $fuid=>$ftime){ $fline=$fuid.'|'.$ftime."\n"; @fputs($fp,$fline); } flock($fp,LOCK_UN); fclose($fp); } } echo "$total_online"; } 然后在想要显示的地方放入以下代码即可,个人觉得放在 footer.php 比较好看<?php echo online_users() ?>
-
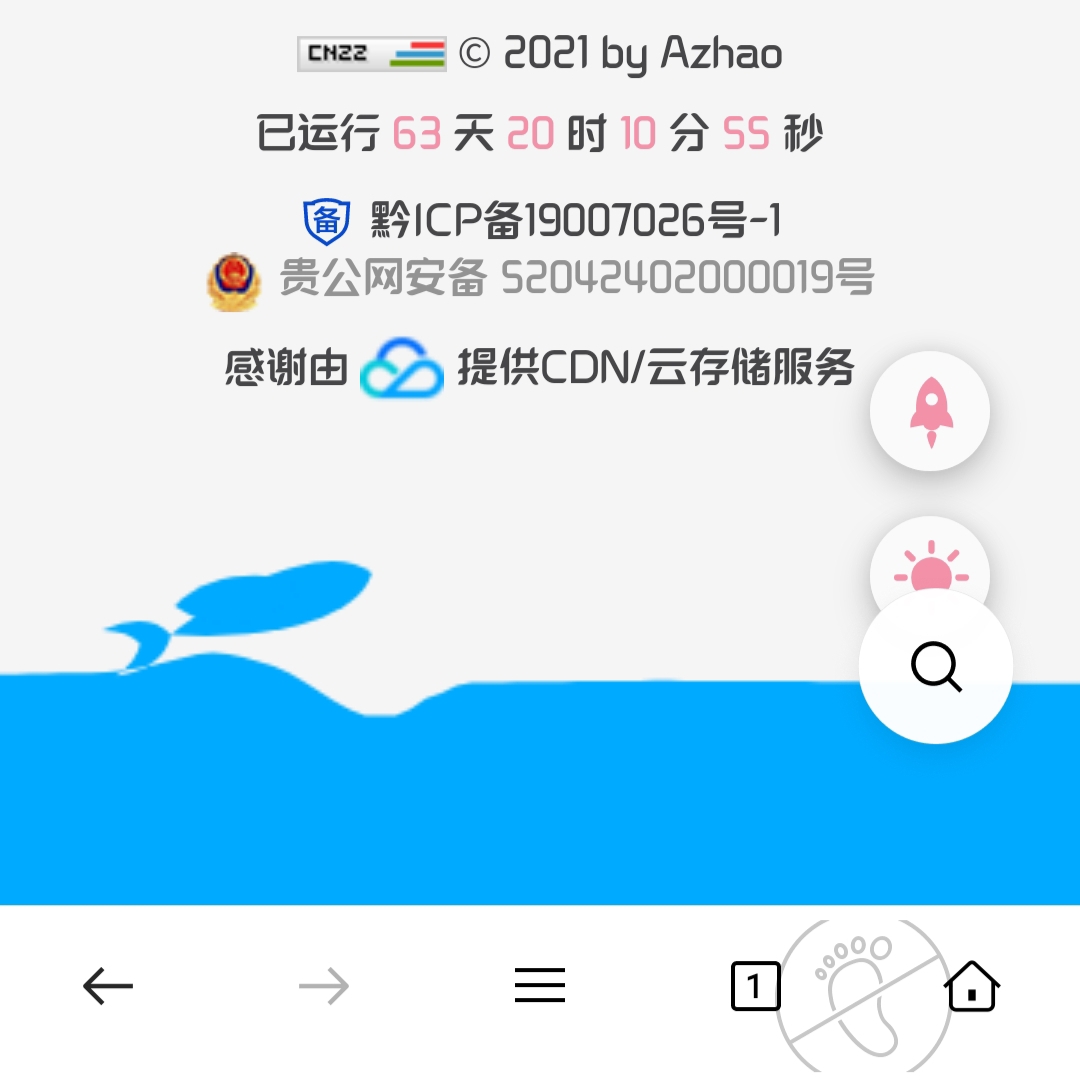 灵动的鱼群跳跃 介绍这是一款灵动的鱼群跳跃,采用 JS 技术,通过 canvas 绘制,适合用在页面底部,增添网站灵动气氛。教程修改 /www/wwwroot/你的站点/usr/themes/Joe/public/footer.php 在 <footer></footer> 之间添加两行代码{tabs}{tabs-pane label="代码"}<div id="jsi-flying-fish-container"></div> <script src="https://www.888mz.cn/1/js/script.js"></script>{/tabs-pane}{tabs-pane label="效果图"} {/tabs-pane}{/tabs}
-
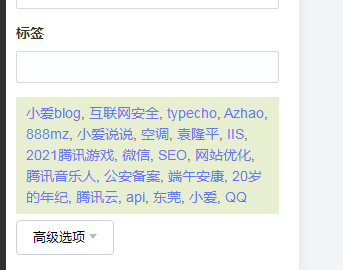 Typecho编辑文章页添加标签列表 前言typecho的文章编辑页面常用的标签选择界面没有系统现有标签选择列表,应用中很是麻烦,需要记忆或者切换到标签管理界面查看。所以就在网上找了一下代码,分享给大家。{tabs}{tabs-pane label="效果图"} {/tabs-pane}{tabs-pane label="代码"}<p style="background:#E8EFD1;display:block;margin:6px 0;padding:6px 10px"> <?php $stack = Typecho_Widget::widget('Widget_Metas_Tag_Cloud')->stack; $i = 0; while (isset($stack[$i])) { echo "<a style=\"cursor:pointer\" onclick=\"t=document.getElementById('tags').value;c=t?',':''; document.getElementById('tags').value=t+c+'", $stack[$i]['name'], "'\">", $stack[$i]['name'], "</a>"; $i++; if (isset($stack[$i])) echo ", "; } ?> </p> 教程第一步,在Typccho系统文件夹内打开admin目录找到 write-post.php 文件PS:是系统文件夹,不是主题文件夹!第二步,打开找到的文件,找到 <?php $post->tags(',', false); ?> 这个代码,然后在下面插入以下代码即可(原文件在94行){/tabs-pane}{/tabs}
-
微信域名检测api接口分享(附上PHP和Python代码) 由于项目需要在微信推广,域名时不时被屏蔽或拦截,更何况微信限制也是越来越严格了。域名被拦截判断分析if 域名能正常访问(显示未被拦截) if 域名被微信拦截 if 链接抱红 else 提示已停止访问网页 if 安全提示 else 提示非官方网页 if 安全提示 else 提示网址包含过多重定向 if 拦截提示 else 请长按复制链接使用浏览器访问(应用场景)微信域名检测api接口代码接口地址: http://api.new.urlzt.com/api/vx 请求方式: GET/POST 请求示例: http://api.new.urlzt.com/api/vx?token=Token值(后台生成获取)&url=www.888mz.cn PHP demo代码<?php // Token值后台生成获取,后台地址:https://dwz.cn/TzLUYNU2 $apiToken = "********************************"; // 需要检测的地址或域名 $reqUrl = "www.urlzt.com"; $url = sprintf("http://api.new.urlzt.com/api/qq?token=Token值&url=www.urlzt.com", $apiToken, $reqUrl); $ch = curl_init($url); curl_setopt($ch, CURLOPT_RETURNTRANSFER, true); curl_setopt($ch, CURLOPT_BINARYTRANSFER, true); $responseBody = curl_exec($ch); $responseArr = json_decode($responseBody, true); if (json_last_error() != JSON_ERROR_NONE) { echo "JSON 解析接口结果出错\n"; return; } if (isset($responseArr['code']) && $responseArr['code'] == 0) { // 接口正确返回 // $responseArr['data']['status'] 的取值范围:ok、blocked // ok 表示正常、blocked 表示被封 printf("测试地址(%s)的状态为:%s\n", $reqUrl, $responseArr['data']['status']); } else { printf("接口异常:%s\n", var_export($responseArr, true)); }Python demo代码# -*- coding: utf-8 -*- import json, urllib from urllib import urlencode def main(): # Token值后台生成获取,后台地址:https://dwz.cn/TzLUYNU2 apiToken = "*********************" url = "https://wx.horocn.com/api/v1/wxUrlCheck" params = { "req_url" : "www.urlzt.com", #需要检测的地址或域名 "api_token" : apiToken, } params = urlencode(params) f = urllib.urlopen("%s?%s" % (url, params)) content = f.read() res = json.loads(content) if res: code = res["code"] if code == 0: #成功请求 print res["result"] else: print "%s: %s" % (res["code"],res["msg"]) else: print "request api error" if __name__ == '__main__': main()
-
 给头像添加呼吸光坏 效果图 代码放在自定义css里面。/*头像呼吸光环和鼠标悬停旋转放大*/ .avatar{border-radius: 50%; animation: light 4s ease-in-out infinite; transition: 0.5s;}.avatar:hover{transform: scale(1.15) rotate(720deg);}@keyframes light{0%{box-shadow: 0 0 4px #f00;} 25%{box-shadow: 0 0 16px #0f0;} 50%{box-shadow: 0 0 4px #00f;} 75%{box-shadow: 0 0 16px #0f0;} 100%{box-shadow: 0 0 4px #f00;}}
-
 对博客的部署与优化 以下是本人对博客进行的一下部署以及优化。部署与优化: {card-list}{card-list-item} 图片、文件静态优化{/card-list-item}{card-list-item} 使用CDN{/card-list-item}{card-list}{card-list-item} 设置伪静态{/card-list-item}{card-list-item} PHP扩展{/card-list-item}{card-list}{card-list-item} Gzip压缩{/card-list-item}{card-list-item} CDN缓存{/card-list-item}{card-list}{card-list-item} Sitemap插件{/card-list-item}{/card-list}图片、文件 本站的所有图片、文件都云存储在腾讯云的COS里,瞬间把源站的压力减少很多,从而实现了静态优化。且使用HTTPS以及自定义CDN加速,放弃本地存储的同时也能完成' 全站HTTPS '(关于如何HTTPS我就不叙述那么清楚了,申请域名的ssl证书,部署后强制HTTPS即可) CDN 使用的是腾讯云CDN,一开始是领了6个月、每个月20G的CDN流量包,(这个流量包足够我们博客类网站的使用了,至于6个月后可以再进行续费,反正腾讯云现在活动多,能便宜买就便宜买了) 如果没有备案的话可以考虑Cloudflare 伪静态 {tabs}{tabs-pane label="Apache"}<IfModule mod_rewrite.c> RewriteEngine On RewriteBase / RewriteCond %{REQUEST_FILENAME} !-f RewriteCond %{REQUEST_FILENAME} !-d RewriteRule ^(.*)$ index.php [L,E=PATH_INFO:$1] </IfModule>{/tabs-pane}{tabs-pane label="IIS"}<!--web.config url rewrite--> <configuration> <system.webServer> <rewrite> <rules> <rule name="Main Rule" stopProcessing="true"> <match url="^(.*)$" /> <conditions logicalGrouping="MatchAll"> <add input="{REQUEST_FILENAME}" matchType="IsFile" negate="true" /> <add input="{REQUEST_FILENAME}" matchType="IsDirectory" negate="true" /> </conditions> <action type="Rewrite" url="/index.php/{R:1}" /> </rule> </rules> </rewrite> </system.webServer> </configuration>{/tabs-pane}{tabs-pane label="Nginx"}server { listen 80; server_name yourdomain.com; root /home/yourdomain/www/; index index.html index.htm index.php; if (!-e $request_filename) { rewrite ^(.*)$ /index.php$1 last; } location ~ .*\.php(\/.*)*$ { include fastcgi.conf; fastcgi_pass 127.0.0.1:9000; } access_log logs/yourdomain.log combined; }{/tabs-pane}{/tabs}Apache:直接新建一个.htaccess文件,里面内容填写下方代码,上传至网站根目录PHP扩展 进一步的优化就需要安装php的扩展“opcache”,这个拓展在一些web控制面板中可以直接安装,通过ssh的方式安装还请自行百度。opcache安装后自动启用,无需你去做其他配置,启用opcache后你需要注意的是,它会缓存你的动态文件,也就是php,如果你修改了php文件,不会即时生效,需要等一会,大约几分钟左右,反正几个缓存器我全部下载了 ::(勉强) ,(还没出现什么问题)Gzip压缩 我们可以通过在Typecho的index.php的<?php下中添加代码开启Gzip压缩。/** 开启gzip压缩, add by 小爱blog */ ob_start('ob_gzhandler');CompressHTML 可以压缩HTML代码和开启Gzip压缩,Gzip等级我设置在5,且开启了HTML压缩。 {abtn icon="" color="#8080ff" href="https://share.weiyun.com/IdeOA8Nz" radius="" content="CompressHTML"/} CDN缓存 缓存我是自己配置的一个简单的CDN缓存,在CDN的控制台域名管理中找到对应的域名,域名的配置里有缓存设置,缓存规则自己写就好了,一般就是JS、CSS等强制缓存就可以了。Sitemap插件 详细请看这里:基友已关站,如果还进行了其他优化,会继续更新